Home Composting
Hello again
Well, I have been having a wonderful time, making my own compost to be ready for my lemon trees and vegetables. While I am ‘cooking’ compost on a large scale, I thought I would quickly summarise the benefits for smaller composters you can make in your back garden. Your garden will love you for it.
Benefits
- Replaces good nutrients back into the soil
- Adds soil bacteria to impoverished soil
- Reduces the need for chemical sprays and factory produced fertilizers
- Reduces the load on rubbish dumps and landfills
- Easy and accessible
- Cost effective
How to plan for a home composter
- Decide on your position. Somewhere warm, flat, with good drainage
- Choose a spot reasonably close, for quick disposal of kitchen cuttings
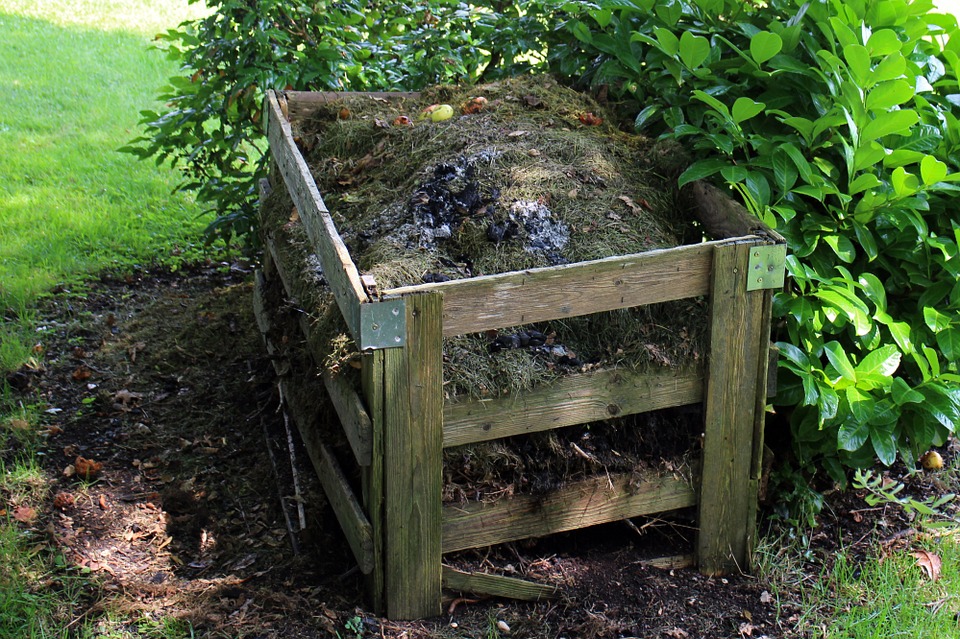
- Decide whether to have an open pile or a bin. Compost heaps generally don’t smell
- Purchased bins are better if you have animals but are limited in size
- Building a bricked in container is useful but requires some set up.
- Cover open composting piles with tarpaulin to keep it extra warm.
Layers and materials
- Compost is best when it is layered with green materials, like grass cuttings for their nitrogen content, and brown, twiggy materials for their carbon content. Alternate these layers.
- Add your kitchen waste and cuttings once you have accumulated a bit. Store in the kitchen in a handy container with a lid that seals. These materials do get moldy and fruit attracts fruit flies. When the container is full, dump it on your compost pile.
- Always top the wet kitchen waste with carbon rich brown. Paper and cardboard work here as well, as do dry leaves.
- Keep layering the greens and browns. As the compost decomposes, the pile will shrink.
- When you add the fresh, give it a little mix to incorporate some of the layers already composting.
- Check the moisture level. Damp but not drowning is the yardstick. If the material is too dry, add water.
- Turn the compost a few times a month
Healthy compost has a fresh, earthy smell. It does not smell rotten. It can be ready anything from 6 weeks to a few months.
Turn it out and use the composted material, (the dark crumbly part), and replace the rest back into the composter to continue the process. Don’t use partially composted material. It robs the soil of nitrogen.
Layer the compost on your grass and mix into your flower beds. You can use compost as top dressing as well as mix it into the soil.
What you can compost
- Twigs
- Leaves
- Branches
- Grass clipping and leaves
- Newspaper and cardboard
- Vegetable waste
- Coffee grounds, tea bags and filters
- Shells: eggs; nuts
- Straw and wood chips
- Fireplace ashes
- Hair and fur
Do not compost
- Coal or charcoal ash
- Dairy products and rotten eggs: for obvious, smelly reasons
- Meat, bones, fat or oils: equally smelly and will attract rats
- Any faeces; The potential parasites will spoil the purity of the compost
- Anything that has been sprayed with chemicals or pesticides.
Have fun grounding outside as well. So good for your own health.
In vitality
Bruce
.
.