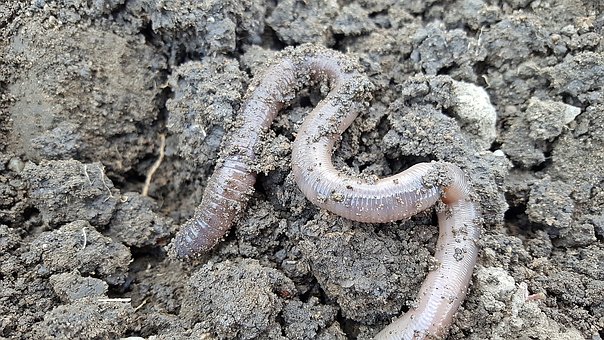
Vermiculture is a method of utilizing worms (get them to do all the work) to decompose organic waste and convert compost into a nutritionally-enhanced substance to grow super-dooper healthy plants in your garden… to admire or to eat.
Today, we will be talking about the wonders of having vermiculture (worm friends) in your garden.
Why Even Start a Vermiculture in Your Garden?
Vermicompost offers a substantial, ongoing supply of enzymes for your plants that greatly enhances soil texture and health. The question is, why should you have one?
The following are the benefits of starting your vermiculture in your garden:
- You can use vermiculture as a recycling option to decompose kitchen waste, namely kitchen scraps, coffee, and even feces. (Although feces may end up being a bit smelly and the question arises… how do I get the feces into the worm farm in the first place; although dog poo is fairly easily transported from grass to worm farm. – Worms like dog poo)
- You can use the organic end- products from vermiculture’s final output (worm wee) to replenish lost nutrients from the soil for your plants, vegetables and fruits.
- Vermiculture is a cheaper and more sustainable option than buying commercial fertilizers. (And so much healthier)
- It provides a healthy cycle… what you eat can end up back in your garden.
- The worms process out the weed seeds, which is great for clean fertilizer.
How Do You Set It Up?
Setting up your vermicompost is relatively easy but a teeny bit labour intensive at the beginning. The whole process needs a reasonable amount of workload and time, so you better be ready before starting your garden worm farm.
Materials Needed:
- Worm bin; You can get these ready made from around R500 – R1200 from http://soilsouls.co.za/ or use polystyrene fruit boxes. Just make sure the bottom stacked layer has no holes in it. It has to hold the worm wee.
- Bedding layer
- Grit
- A cover so the sun doesn’t cook them. Best keep the farm under cover.
- The price varies depending on how many you buy.
- Food for the worms. This is where paper towel, food and vegetable waste comes in. Be more sparing with meat products as they may attract maggots and also get smelly. Worms love banana peels
- Water
- Small Shovel
Procedure:
All the effort is in the beginning. It gets easier once you have set your worms up.
- For a standard four-square feet worm bin, I would recommend you begin with 1 lb. of worms.
- Use paper scraps, peat moss, plant fiber, wood residues, or compost as a bedding layer.
- Next, apply a few handfuls of dirt and add “grit,” The worms make use of grit in the tiny worm gizzards to digest food particles easily. A bit like a built- in grinder.
- After that, your bedding content is going down. Torn up newspaper makes great, fluffy bedding.
- Keep the cover off and light (not full sunlight) on your bin for a whole day, so the worms can relax in their fresh bedding. We all need time to acclimatize in a new home.
- To bury the food scraps, you should bore a hole into the bedding, tuck in your food scraps, and cover them entirely with clean bedding.
- Keep on feeding fresh worms in a new worm bin for several days. Start moving them around slowly with the feed.
- Add some food and observe the worms before adding more. Don’t bury your worms in food as worms breathe through their skin and need the air to circulate.
- Use a box, or scoop made of wood to gently lift the earthworms.
- You should harvest the worm castings after a few months (drain it off). Some bins have a tap you can just open so the worm wee can flow out and you can apply it as fertilizer to your plants.
- Begin again, embedding food scraps in fresh bedding.
- In up to 6 weeks, worms can shift from the mature compost to populate the fresh bedding. Lastly, you can harvest the compost, and as your population grows you may need to install another open room in your bin. This is where the stacking bins come in handy.
Conclusion
Overall, having your vermiculture for your backyard garden is a sought-after way of getting the best out of any organic waste that you have in your house. Not to mention that it is also more sustainable and cheaper than buying fertilizers.
So, if you do not have vermiculture yet, now is the time to set up one!
Sources:
http://working-worms.com/blog/
https://sites.google.com/a/ggsim.org/official-website/gardening/vermiculture